GIF How to
By popular demand, a basic how-to for GIF images in Photoshop. First of all, I’m using Elements 5, so it may vary a little based on the version you have.
Also, I am not adding steps for lining up the images. The easiest way I have found is after the images are circle cropped and put into one file (without a merged background), select free rotate and put the darker images opacity around 50% and on top of the lighter image. This allows you to see a ghost image of the top layer. Now free rotate the second layer until it’s as close as you can get to matching up with the ghost image. Repeat this process (leaving the ghost image as the top image and rotating the ‘bottom’ image so your template remains the same) until all photos are lined up.
The photo-documented how to will pick up from the point that you have all the images lined up and the same size, as shown below:
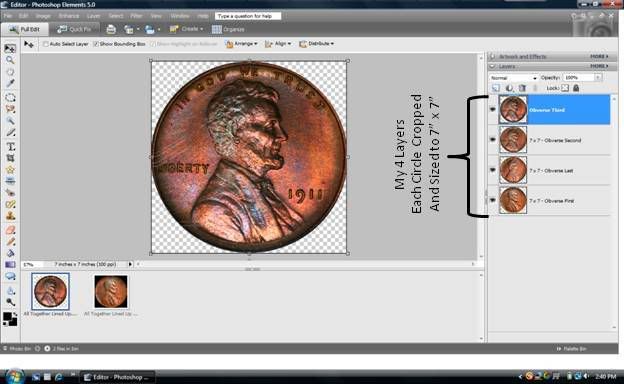
All your images are individual layers and circle cropped. In order for the GIF to turn out correctly, each layer needs its own background. To accomplish this I create new layers for each image with the size I am using (in this case 7” x 7” at 100 ppi) see below:
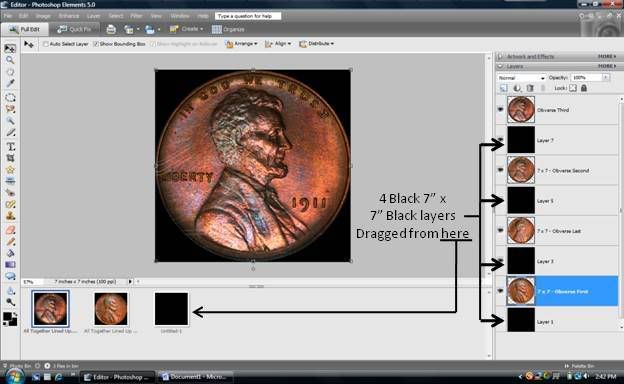
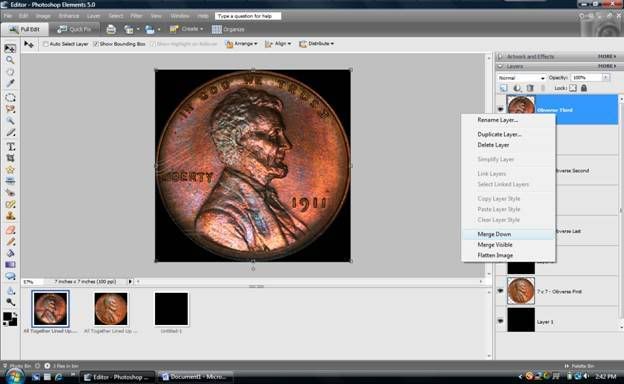
I now set the layers so that I have my first picture, then a black background, then second picture, and so-on until all the images have a black background after them as seen in the picture above. If you right click on the picture, an option is ‘merge down’. Select this option and repeat until each of your images has a black background. You are now ready for the animation and final review processes.
*This part is optional but helps make the GIF look much better. I always do a quick flip through of my images to make sure they blend together and look good in the order I have. In this particular GIF I copied layer 2 and placed it between the current layers 3 and 4 to make them blend together better. Thus I have 5 images not 4 as when I started, see below:
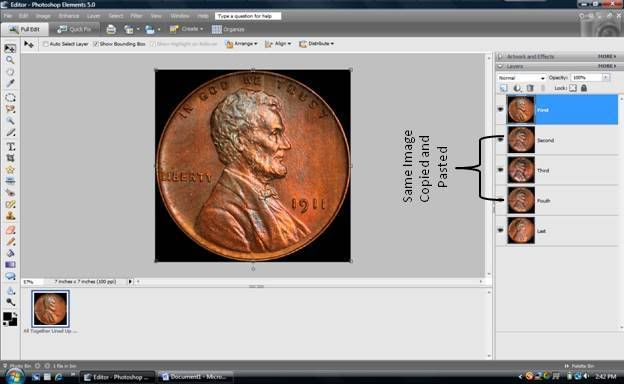
Now I have all my images aligned as well as I can, they are in the order I want, they are all the same size (7” x 7” at 100 ppi), and they all have a black background. I am ready to save and to do so select file -> ‘Save for Web’.
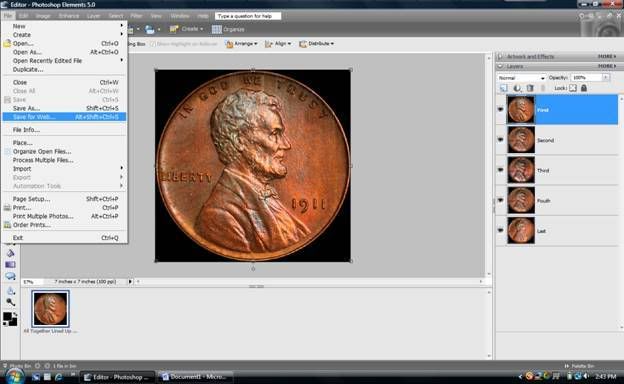
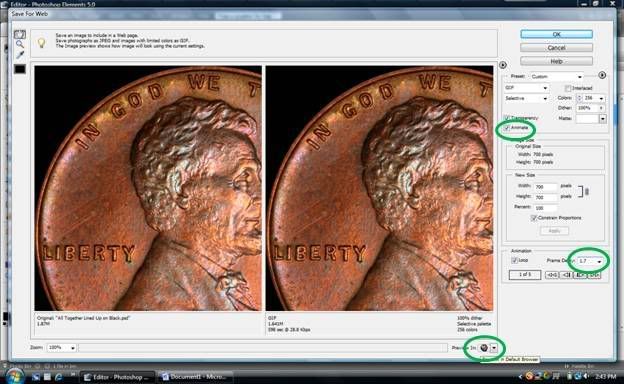
The screen below will pop up as your saving options screen. Make sure to pay attention to the three green circles. The top right circle is the animate box, click this option or your gif is a picture and won’t flip through the images. The bottom right circle is highlighting the time box. Lately I’ve been using 1.7 seconds as my flip time and have been happy from 1.5 to 2 seconds. The third box in the bottom middle is a web preview. It’ll let you see what the finished GIF looks like. When you are happy with the timing, push save and you are finished!
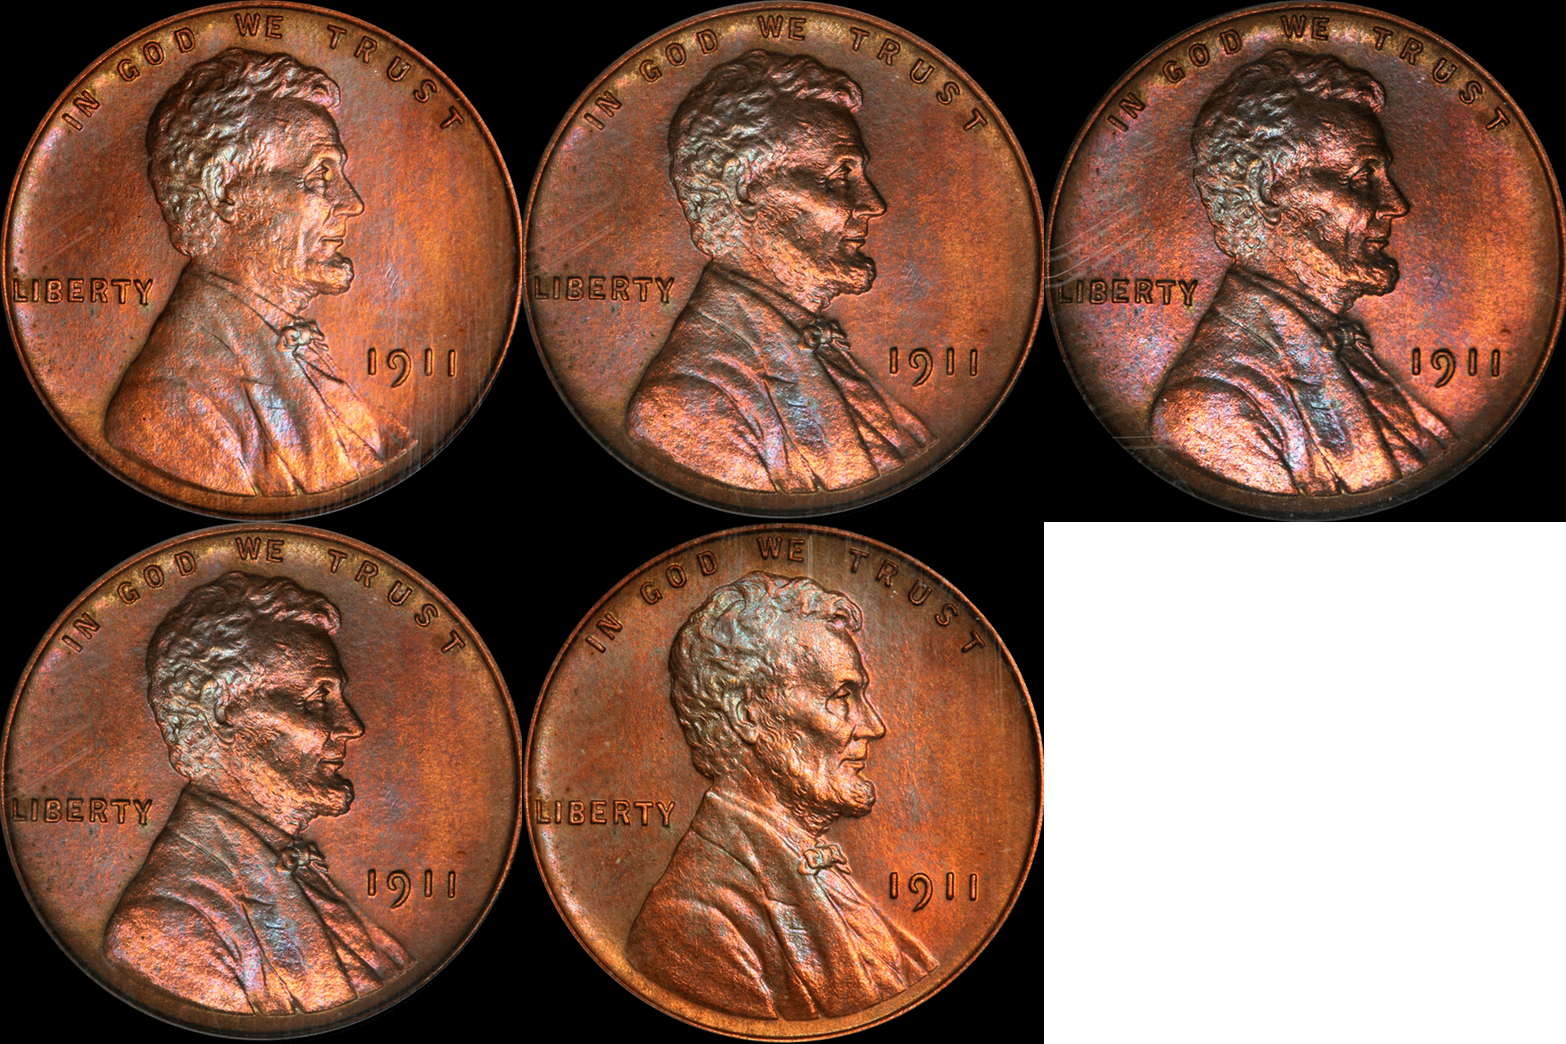
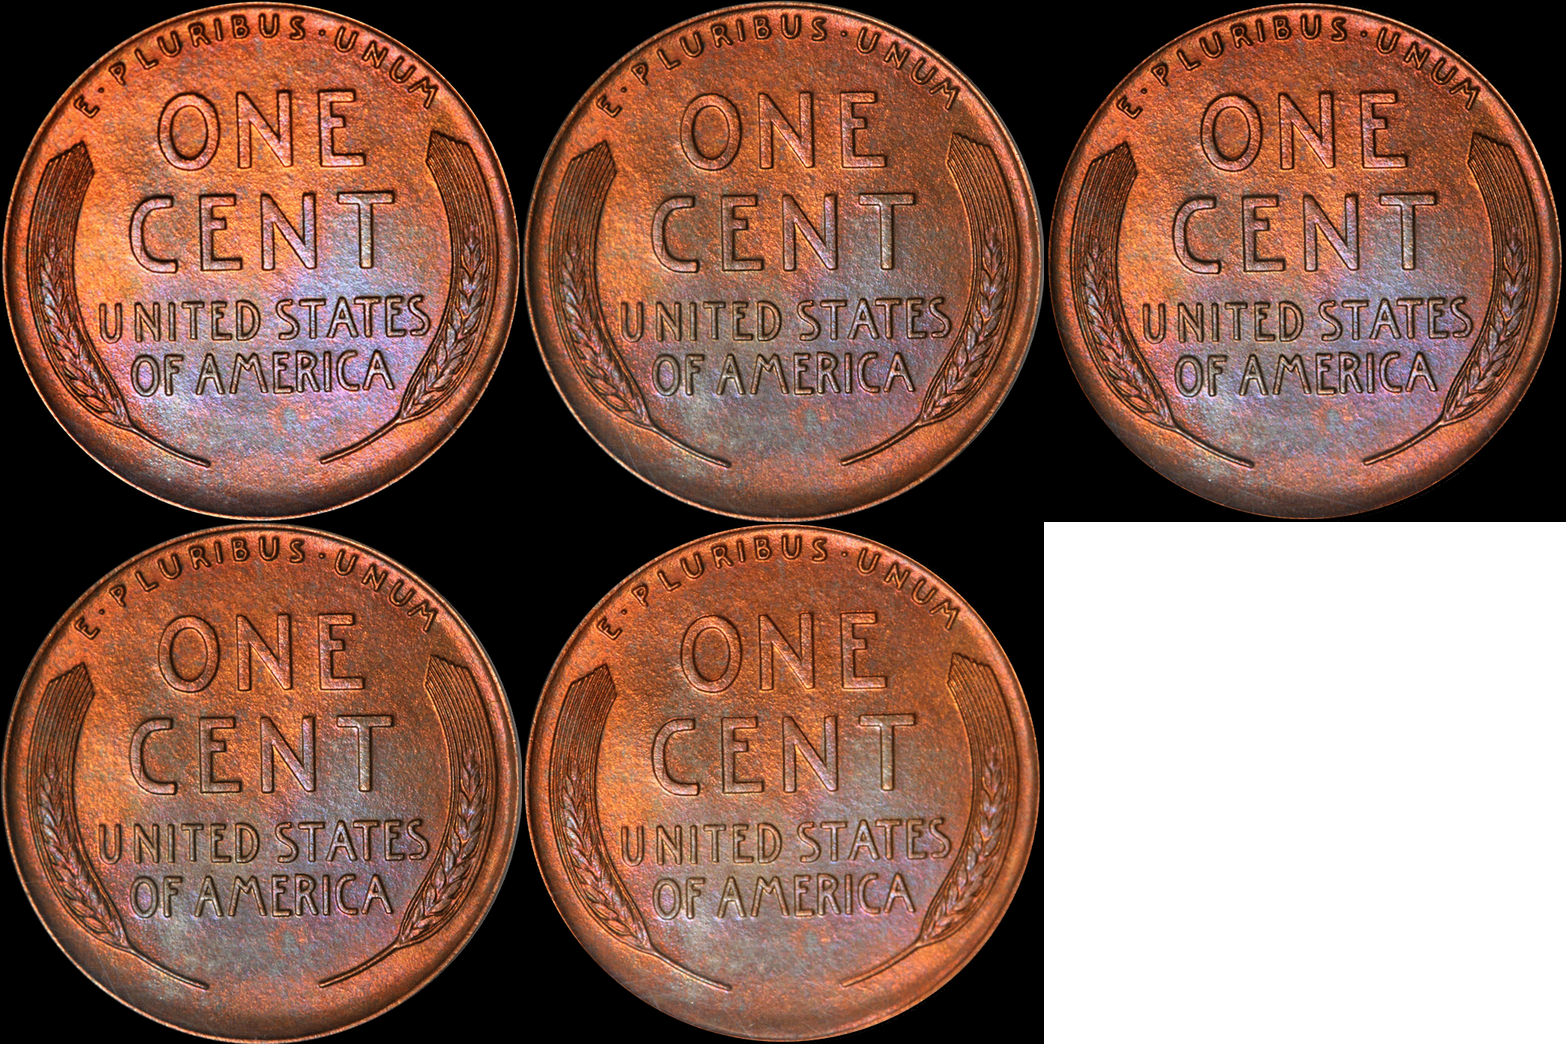
Your final results will look somewhat like this:
Also, I am not adding steps for lining up the images. The easiest way I have found is after the images are circle cropped and put into one file (without a merged background), select free rotate and put the darker images opacity around 50% and on top of the lighter image. This allows you to see a ghost image of the top layer. Now free rotate the second layer until it’s as close as you can get to matching up with the ghost image. Repeat this process (leaving the ghost image as the top image and rotating the ‘bottom’ image so your template remains the same) until all photos are lined up.
The photo-documented how to will pick up from the point that you have all the images lined up and the same size, as shown below:

All your images are individual layers and circle cropped. In order for the GIF to turn out correctly, each layer needs its own background. To accomplish this I create new layers for each image with the size I am using (in this case 7” x 7” at 100 ppi) see below:

I now set the layers so that I have my first picture, then a black background, then second picture, and so-on until all the images have a black background after them as seen in the picture above. If you right click on the picture, an option is ‘merge down’. Select this option and repeat until each of your images has a black background. You are now ready for the animation and final review processes.

*This part is optional but helps make the GIF look much better. I always do a quick flip through of my images to make sure they blend together and look good in the order I have. In this particular GIF I copied layer 2 and placed it between the current layers 3 and 4 to make them blend together better. Thus I have 5 images not 4 as when I started, see below:

Now I have all my images aligned as well as I can, they are in the order I want, they are all the same size (7” x 7” at 100 ppi), and they all have a black background. I am ready to save and to do so select file -> ‘Save for Web’.

The screen below will pop up as your saving options screen. Make sure to pay attention to the three green circles. The top right circle is the animate box, click this option or your gif is a picture and won’t flip through the images. The bottom right circle is highlighting the time box. Lately I’ve been using 1.7 seconds as my flip time and have been happy from 1.5 to 2 seconds. The third box in the bottom middle is a web preview. It’ll let you see what the finished GIF looks like. When you are happy with the timing, push save and you are finished!

Your final results will look somewhat like this:


Want to buy an auction catalog for the William Hesslein Sale (December 2, 1926). Thanks to all those who have helped us obtain the others!!!
0