Different methods for taking variety images compared
 rmpsrpms
Posts: 1,967 ✭✭✭✭✭
rmpsrpms
Posts: 1,967 ✭✭✭✭✭
There are many different ways of taking variety images. I made a comparison page showing 4 techniques:
75mm full-coin macro lens smart-cropped to show area of interest
75mm full-coin macro lens with 2x teleconverter to increase magnification
35mm details macro lens
4x microscope objective with focus stacking
Take a look at the comparison here and let me know any comments:
http://www.macrocoins.com/variety-image-compo.html
There are of course more ways to do this, for instance using a USB microscope, a cellphone with a loupe, or a stereo microscope, but none of these have the image quality of the techniques I'm comparing.
1
Comments
While I see a slight bit of clarity/crispness in the focus stacking, I would be happy with any of those images. I know photography is your passion and I enjoy seeing the images you bring here to the forum. I suspect my IPad does not show the definition that you bring with your photos.
the way I look on it is all the same, like MS 69 vs MS 70 you can not see the Big Difference just Number on a Holder of any Third Party Coin Grading.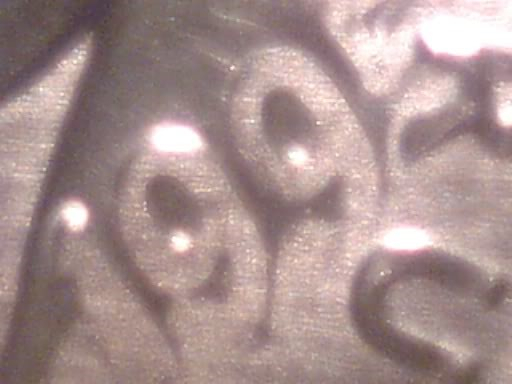 my very close up using Blue USB Microscope 1995 Dime Full date overlapping 5 by R on Trust in my 1995 Doubled Denomination 1995 Penny On Dime Planchet now 20 years in Accugrade Holder. - Still Untoned.
You can all see the VDB that unreeded and the rest is REEDED DIME..Perfectly round andNO Ding in any surfaces the rim is so great to look on it. Mirror Proof like in some areas obverse and reverse.
Interesting, but not surprising results. I agree that most other techniques don't have the same image quality, but the right stereo microscope with a fixed camera mounted can do very well. The difficulty there is that there is both an objective and an eyepiece in play. I use a hand-held point and shoot camera and a stereo microscope mostly because it's the best workflow for me.
Once upon a time, Mark Goodman had me reviewing a manuscript for a book he was considering doing comparing methods for shooting at higher than 1:1 magnification. It had a lot of technical information in it, as well as comparisons of how various types of lenses performed at various magnifications. I assume this was shelved indefinitely. You might want to contact him if you're interested in what he had done.
One thing that I floated by him was using a single wavelength of light to reduce effects of diffraction and increase sharpness, especially with lower cost lenses. As I always convert my shots like this to gray scale images, the color of the coin is at best irrelevant, and at worst distracting. I also have more latitude to play with contrast to better show some of the details. With some of the LED lighting available now, you can switch between green and red easily, using whichever is more advantageous. Green will give shorter exposure times and works well for silver and brown copper. Red works well for brilliant copper and gold and will hide splotchy tan toning on silver coins.
I took the "cheapest" image (75mm lens alone) and separated out the color channels. The first thing that was apparent was that diffraction was your enemy with this lens. The green channel is noticeably sharper than the red channel (the blue channel doesn't contribute much).
Red channel:

Green channel:

Then I increased contrast and unsharp masked the image (sigma = 1.5, strength = 0.5). Yes, the highlights are saturated, but what is of interest is the variety pick-up points.

Shrink it down and unsharp mask again (sigma = 1.0, strength = 0.3) and it's still very useful.

While this will not give you the same type of image as a focus-stacked image will, it is an improved picture of the variety without additional expense.
Keeper of the VAM Catalog • Professional Coin Imaging • Prime Number Set • World Coins in Early America • British Trade Dollars • Variety Attribution
@redub117 said: "...the way I look on it is all the same, like MS 69 vs MS 70 you can not see the Big Difference just Number on a Holder of any Third Party Coin Grading."
Welcome to CU. However, in a attempt to keep the PCGS forum the BEST PLACE for numismatic info, many members don't tolerate nonsense. You are 100% incorrect. There is a visible difference between a 69 and a 70.
Why not take a guess what it is.
BIG CLUE. On a few occasions, what any TPGS puts on a label may be subject to dispute so leave them out of your sentence if you respond.
I intentionally did not do any sharpening on the comparison images since it tends to "equalize" things unnaturally. Sharpening an already sharp image does not improve it much, and may actually degrade it if not done correctly. Sharpening a diffraction-limited image makes it look "better", but can't add-back information that was lost to diffraction.
A good part of the resolution problems you're seeing for the red channel is due to the Bayer pattern, which only has half the resolution at the sensor level as the green channel, which itself accounts for only half of the pixels. In any 6x6 pixel grid, the sensors in (most) cameras have only 18 out of 36 pixels devoted to Green, and only 9 each devoted to Red and Blue. The Green pixels are interleaved such that it's easy to recover (interpolate) the data in the missing pixels, but the Red and Blue are simply patterned at a lower resolution. The software does its best to interpolate, but ultimately the Red and Blue channels cannot give good resolution and end up looking very soft as you showed above.
For folks not familiar with Bayer filters, see the image (Fair Use from Wikipedia) below to help understand why your "18MP" camera really only has 4.5MP:
By shrinking the image, you actually fix some of the problems described above. Note that it's best to do the shrinking in integers to minimize software interpolation of the pixels. When you shrink 50%, you effectively give every pixel in the shrunk image full color information since the Red and Blue were sampled at that resolution. The Green is then oversampled, so it also has full resolution at the smaller size. This also has the effect of improving diffraction blurring by a factor of 2. My advice to folks is to always publish their images with 2x downsizing if they want them to be as sharp as possible, with best color rendition, with largest image size that still achieves these goals. This is a part of what I call "Smart-Cropping" on my linked web page.
Further note that the "best" results I'm showing are for a 4x objective with 0.1 NA, which is very modest and inexpensive. At 4x the effective aperture is f20, deeply diffraction-limited for all wavelengths.
All that said, your conversion to monochrome, and subsequent sharpening, clearly improved the fuzzy cropped image, making it more useful. Thanks for showing that.
http://macrocoins.com
It's not as easy to see the differences between the full-field images since they have been downsized ~4x, which tends to equalize things due to reduction in diffraction fuzziness. It's much easier to see the differences in the mintmark crops. Ultimately I made this page so that folks could see their options, and understand the tradeoffs for cost, difficulty, and image quality between different methods, so they can make an informed choice if they are looking at photographing variety details.
http://macrocoins.com